Fillet
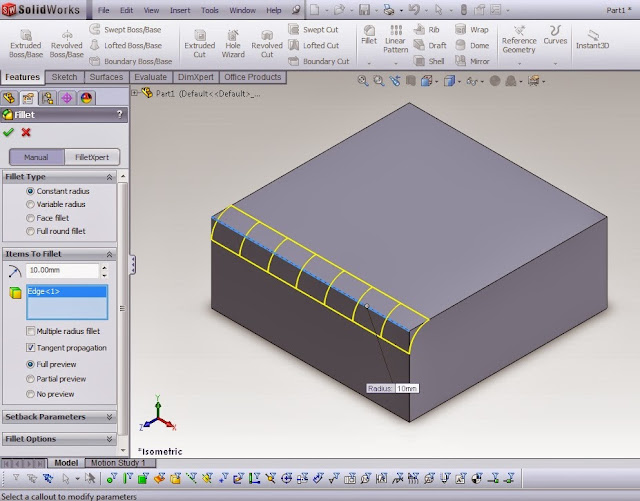
Fillet is used to create a rounded profile on an edge. The edge can be an external of internal profile of a part. SolidWorks fillet function gives a wide flexibility from simple fillet (constant radius) up to an advanced options. However, most of the time user would only use constant radius fillet. |
| Edge before fillet (left) and after fillet (right) |
The important parameter that user need to know on the function is mainly the fillet radius size and the geometry selection. Two type of geometry can be selected on fillet function, which can be either edge or surface. When edge is selected, the selected edge would be replaced with a rounded profile with the specified radius. When a surface is selected, SolidWorks would automatically select all edges that forms the surface. See the difference in the two images below.
 |
| Fillet with edge as selected geometry |
 |
| Fillet with surface as selected geometry |
Chamfer
Chamfer works almost the same as fillet, only that it creates a bevel on the edge instead of rounded profile.The feature can be accessed by clicking Insert > Features > Chamfer, or by clicking the small drop down arrow below the fillet button on Features Ribbon to reveal the shortcut.
SolidWorks allow user to determine the chamfer size using two method: angle distance, and distance distance.
On angle distance method, user determine the distance of the bevel and the angle of the bevel. By default, the default angle would be set to 45 degree. User can input the bevel angle between 0 to 90 degree. On distance distance method, user is prompted to enter the distance of the two edges of the chamfer.
The geometry selection on chamfer is exactly the same as on fillet, which can be either edges or any face. The edge that form the face would be automatically selected when surface is selected as the input geometry.


